EL-wire uses very low power and has become popular for wearable computing projects, e.g. heartbeat jacket http://www.sparkfun.com/tutorials/130 or speed jacket http://makeprojects.com/Project/Speed-Vest/1344/1
Making an LED blink is easy. But how about EL-wire? This short tutorial shows you how to achieve what you see in the following video:
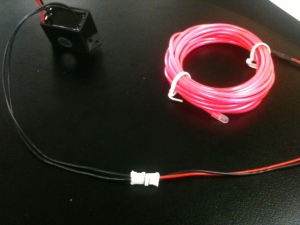
As EL-wire requires AC power input, you can’t control it directly via an Arduino. Therefore you need an inverter and a TRIAC (thrysistor). Here’s the full list of what parts you’ll need:
- Arduino
- EL-wire (e.g. http://littlebirdelectronics.com/products/el-wire-pink-3m)
- EL-inverter (I used a 3V inverter from Littlebirdelectronics http://littlebirdelectronics.com/products/el-inverter-3v)
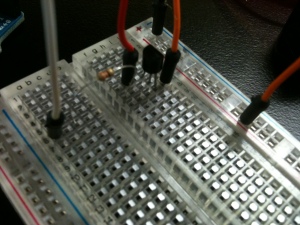
- A TRIAC (http://littlebirdelectronics.com/products/triac)
- 330 Ohm resistor
1) Connect the output wires of the inverter with the EL wire. If your EL-wire doesn’t come with connectors, ladyada provides a nice tutorial how to solder EL wire to an inverter. Ladyada’s tutorial also comes in handy if you want to cut your EL-wire to a custom length.
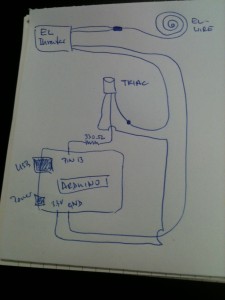
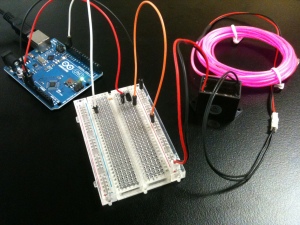
2) The input wires of the inverter (usually red/black if not labeled otherwise) need to be connected to ground and power (3V). As you want to manually switch on/off the EL-wire via an Arduino, you need to put a TRIAC in between the power supply and the positive / red wire of the inverter (see circuit below).
The black wire is directly connected to ground. Whenever you set PIN 13 high, the TRIAC closes the circuit, i.e. makes the EL-wire glow.
3) Upload the blink example to your Arduino:
/*
  Blink
  Turns on an LED on for one second, then off for one second, repeatedly.
  This example code is in the public domain.
 */
void setup() {
  // initialize the digital pin as an output.
  // Pin 13 has an LED connected on most Arduino boards:
  pinMode(13, OUTPUT);
}
void loop() {
  digitalWrite(13, HIGH);   // set the LED on
  delay(1000);              // wait for a second
  digitalWrite(13, LOW);    // set the LED off
  delay(1000);              // wait for a second
}
You should see the EL-wire going on and off.
From here you can expand your code and make your EL-wire go on and off according to your project needs, e.g. make it respond to particular sensor-values attached to your Arduino. Also, EL-wire is quite flexible, so you can easily form custom shapes, such as here:


Hi,
I followed the tutorial and the EL wire blinked for about 30 seconds and now just stays lit. I’ve re-uploaded the code and reset the Arduino. Have you had a similar experience?
Thanks for posting this tutorial.
tzola
LikeLike
hi tzola, what voltage are you applying? I’ve had a similar problem with 5V, then I went down to 3.3V and it worked just fine…
LikeLike
Could i expand this to use the same inverter for multiple el-wires, to turn on-off in the sequence i want, just by connecting multiple triac/octo’s input pins on the same inverter output ?
LikeLike
In the circuit above you are switching the DC with a triac. This will not work as tge triac will not turn off. A triac is meant for switching AC, that is, the output of the inverter. If you want to switch DC use a MOSFET or a transistor.
LikeLike
what power supply did you use for the arduino? could i supply this with a 3v wall wart or does is need one with a higher voltage since the arduino’s input voltage is from 7v-12v
LikeLike
What would I need in order to switch the el wire on and off after the driver? I need to be able to switch multiple strands on and off using a single inverter. I know that it’s a certain AC voltage but not sure what type of transistor would work for this. Thanks for your help!
LikeLike
Pingback: Culturally Responsive Pedagogy: STEMArts Workshop & Pre-PASEO Pop-Up | Renegade Futurism
Works perfectly, thanks for uploading
LikeLike